How to Charge a Hoverboard Safely and Efficiently
Last updated: June 8, 2026
Quick answer: Turn the hoverboard off, let it cool after riding, plug the original charger into the wall first, then connect it to the hoverboard. Charge on a hard, open, non-flammable surface and stop when the charger light turns green. Do not charge it overnight or leave it unattended. For outdoor trips, use the original hoverboard charger plugged into a pure sine wave portable power station with enough AC output for the charger’s wattage.

How to charge a hoverboard step by step
Most hoverboard charging problems come from three things: using the wrong charger, charging in the wrong place, or ignoring early warning signs. The safe routine is simple, but the order matters.
At-home charging steps
- Turn the hoverboard off. Do not charge while riding, balancing, or leaving the board powered on.
- Let it cool first. If the hoverboard was just used, give it time to return to room temperature.
- Inspect the charger and port. Look for bent pins, cracked plastic, loose plugs, burnt smell, swelling, moisture, or frayed cable insulation.
- Place the board on a hard, open surface. Tile, concrete, or another non-flammable surface is safer than carpet, bedding, a couch, or a cluttered garage corner.
- Plug the charger into the wall first. The charger light is often green when it is powered but not yet charging.
- Connect the charger to the hoverboard. The charger light often turns red during charging.
- Stay nearby. Do not leave the house, go to sleep, or cover the hoverboard while charging.
- Unplug when full. When the charger light turns green, disconnect the charger from the hoverboard first, then unplug it from the wall.
How to read the hoverboard charger label
The safest charger is the original charger supplied with the hoverboard or the exact replacement specified by the hoverboard manufacturer. Do not choose a charger only because the plug “fits.” Voltage, battery chemistry, polarity, and connector type all matter.
| Label item | What it usually means | What to check before charging | Why it matters |
|---|---|---|---|
| Output voltage | Many 36V lithium hoverboards use a 42V DC charger. | Match the charger output to the hoverboard manual or original charger label. | Wrong voltage can prevent charging, damage the battery, or create a safety risk. |
| Output current | Common examples include 1.5A, 2A, or similar. | Use the manufacturer-specified current rating. | Higher current is not automatically “better.” The battery management system and wiring must support it. |
| Wattage | Watts = volts × amps. A 42V 2A charger is about 84W. | For portable power station use, choose an AC outlet rated higher than the charger wattage. | This tells you whether a battery-powered outlet can run the charger safely. |
| Connector | Some look similar but are not wired the same. | Match plug size, pin layout, and polarity. | A wrong connector can short, fail to charge, or damage the charging port. |
| Battery chemistry | Most hoverboards use lithium-ion battery packs. | Do not use chargers meant for lead-acid batteries unless the manufacturer specifically says so. | Different chemistries require different charging profiles. |
Swipe sideways on mobile to view the full table.
How long does a hoverboard take to charge?
Most consumer hoverboards charge in about 2 to 5 hours, depending on battery size, charger wattage, battery age, temperature, and how empty the battery is when you start.
The extra 15% to 25% covers normal charging losses and the slower final part of charging. A lithium battery does not usually charge at full speed from 0% to 100%.
| Common hoverboard battery | Approx. battery energy | Charger example | Charger wattage | Estimated charge time | Best use of this estimate |
|---|---|---|---|---|---|
| 24V / 4.4Ah small board | About 106Wh | 29.4V / 1.5A | About 44W | About 2.8–3.2 hours | Kids’ smaller boards or lightweight models |
| 36V / 4.4Ah common board | About 158Wh | 42V / 1.5A | About 63W | About 2.9–3.2 hours | Typical 6.5-inch hoverboards |
| 36V / 4.4Ah common board | About 158Wh | 42V / 2A | About 84W | About 2.2–2.4 hours | Many standard replacement charger ratings |
| 36V / 6Ah larger board | About 216Wh | 42V / 2A | About 84W | About 3.0–3.2 hours | Heavier all-terrain or Bluetooth models |
| 36V / 7.5Ah larger board | About 270Wh | 42V / 2A | About 84W | About 3.7–4.1 hours | Longer-range hoverboards |
Swipe sideways on mobile to view the full table.
Do not keep charging just because you want “a little more.” Once the charger shows full, unplug it. Leaving a hoverboard at 100% for long periods adds heat and stress without giving you meaningful extra ride time.
Can you charge a hoverboard with a portable power station?
Yes. The safest way is to plug the hoverboard’s original AC charger into a pure sine wave portable power station. Do not try to bypass the hoverboard charger and do not connect the hoverboard battery directly to a power station DC port.
What the power station needs
- Pure sine wave AC output: cleaner power for small chargers and electronics.
- Enough rated watts: a 42V 2A hoverboard charger is about 84W, so even a compact power station with a 200W+ AC outlet can handle one charger comfortably.
- Enough watt-hours: capacity decides how many full charges you can get.
- Safe charging location: even when using a power station outdoors, charge on a hard, open surface and stay nearby.
For UDPOWER runtime planning, this guide uses 90% real-world conversion efficiency. Your exact result can change with charger design, battery temperature, battery age, and whether the hoverboard is fully empty when charging starts.
Recommended UDPOWER power stations for hoverboard charging
A hoverboard charger is a light AC load. That means you usually do not need a huge power station for one board. The right choice depends on whether you are charging one hoverboard after a neighborhood ride, several boards at a park, or running a bigger outdoor setup with phones, speakers, lights, and a mini fridge at the same time.

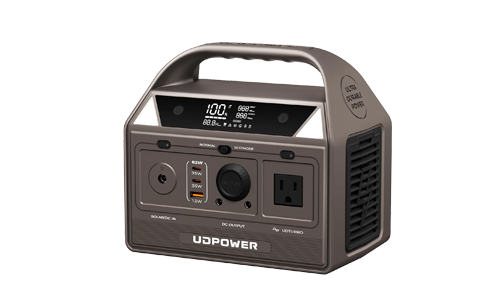
UDPOWER C400 Portable Power Station
The C400 is the most practical match for one hoverboard charger. It gives you far more AC output than a typical hoverboard charger needs, while staying small enough for car trips, parks, sports days, and weekend rides.
- Capacity: 256Wh
- AC output: 400W pure sine wave, 800W surge
- Battery: LiFePO4
- Weight: about 6.88 lb
- Estimated full charges for a 158Wh hoverboard: about 1.4×
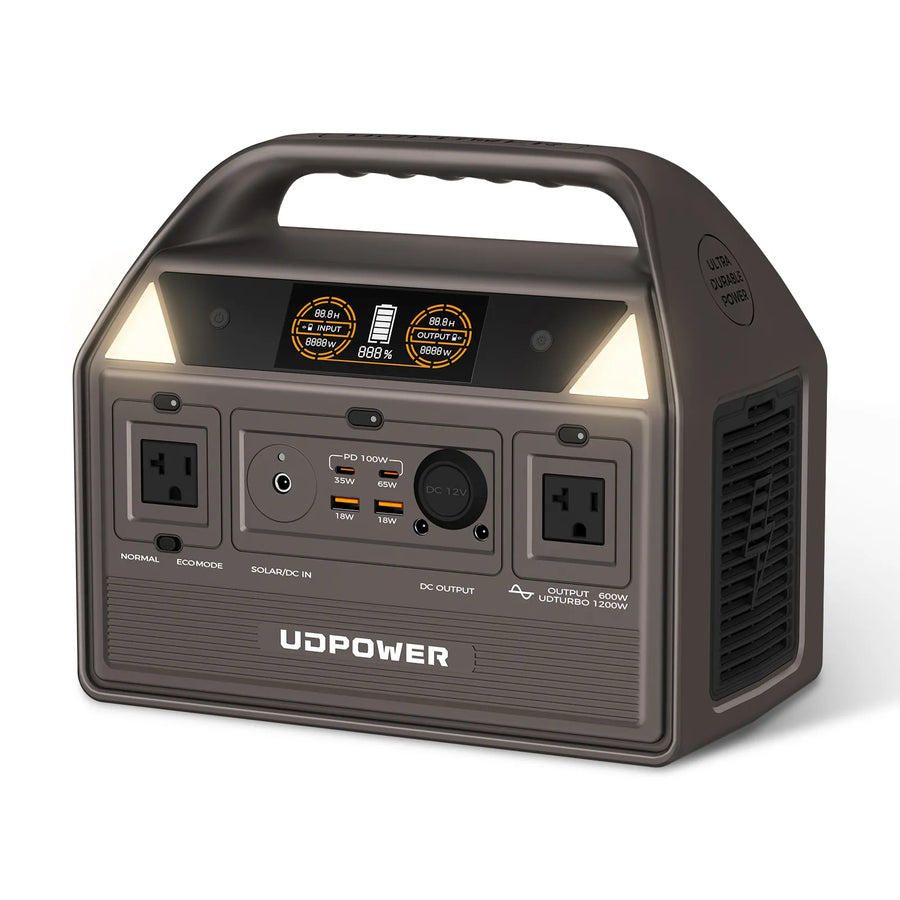
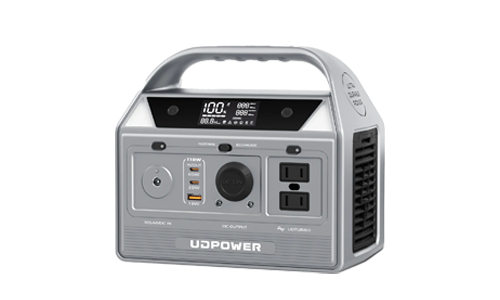
UDPOWER C600 Portable Power Station
The C600 is the better choice when you want more than one full hoverboard recharge, or when the same power station also needs to run phones, a laptop, camera batteries, lights, or a small speaker during a day out.
- Capacity: 596Wh
- AC output: 600W pure sine wave, 1200W max
- Battery: LiFePO4
- Weight: about 12.3 lb
- Estimated full charges for a 158Wh hoverboard: about 3.4×
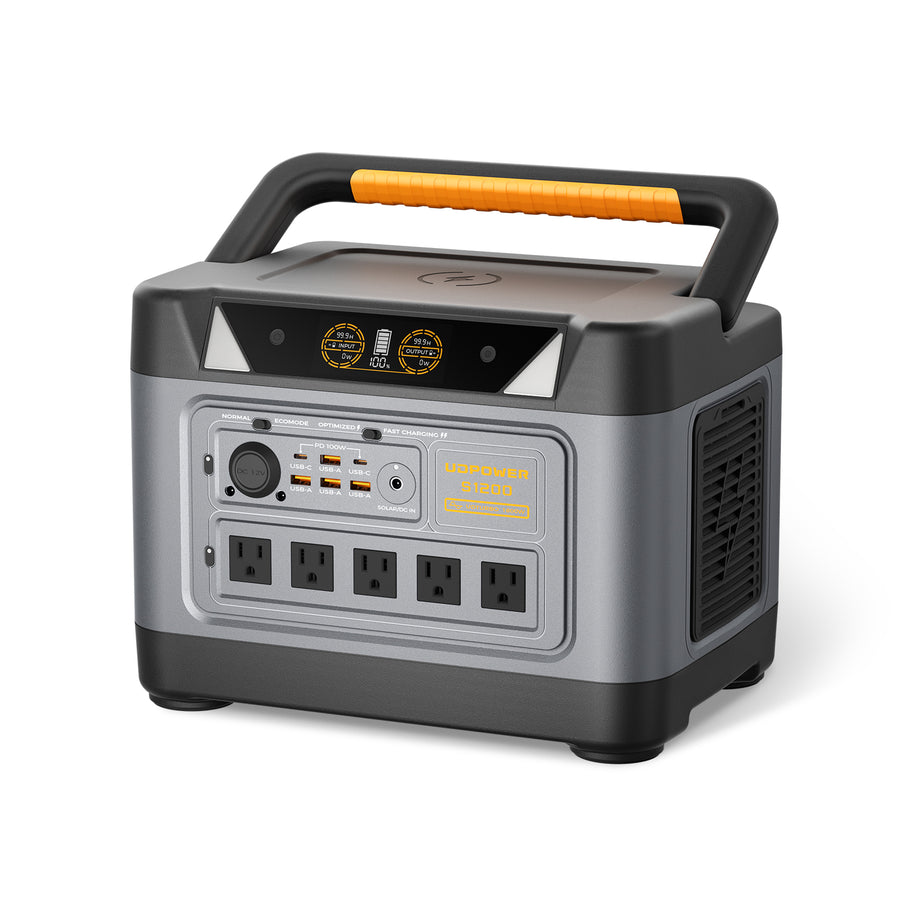
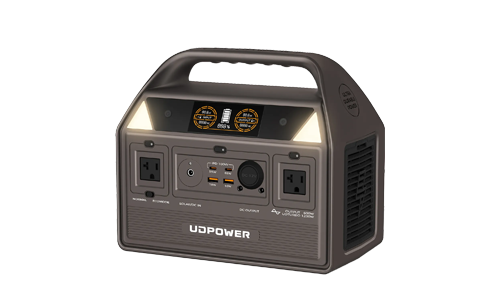
UDPOWER S1200 Portable Power Station
The S1200 is more power than one hoverboard needs, but it makes sense for families, rental use, camping weekends, tailgates, or outdoor events where hoverboards are only one part of the power plan.
- Capacity: 1,190Wh
- AC output: 1,200W pure sine wave, 1,800W surge
- Battery: LiFePO4
- 5 AC outlets
- Estimated full charges for a 158Wh hoverboard: about 6.8×
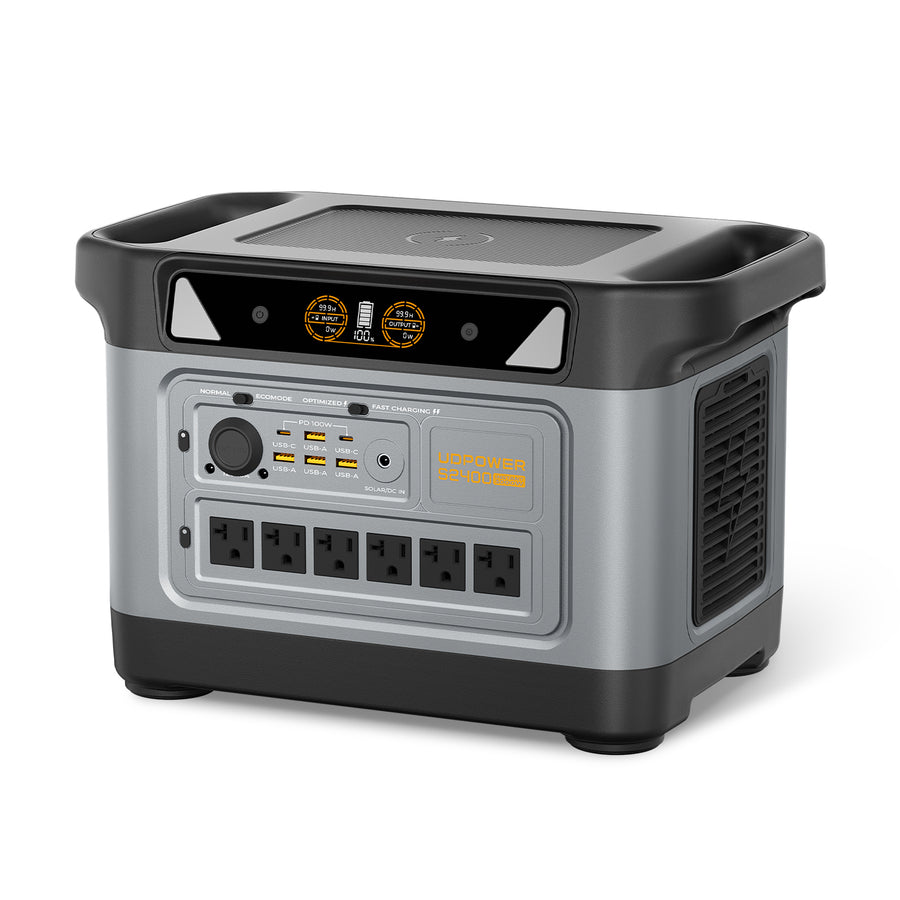
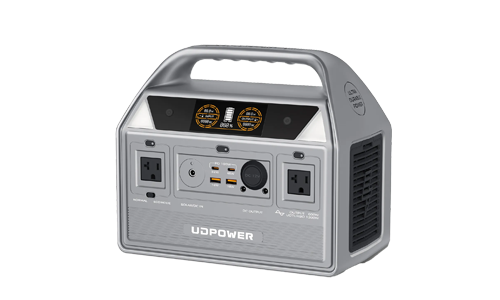
UDPOWER S2400 Portable Power Station
The S2400 is not necessary for a single hoverboard charger. Choose it when you need one larger power hub for multiple chargers, a camping setup, a refrigerator backup plan, or several AC devices at the same time.
- Capacity: 2,083Wh
- AC output: 2,400W pure sine wave
- Surge: up to 3,000W for startup surges
- 6 AC outlets
- Estimated full charges for a 158Wh hoverboard: about 11.9×
How many hoverboard charges can you get from a power station?
The table below uses a common 36V / 4.4Ah hoverboard battery, which is about 158Wh. If your battery label shows a different Wh rating, use your own number.
| Power source | Capacity | Usable estimate at 90% | Approx. full charges for 158Wh hoverboard | Best fit | Official product/source |
|---|---|---|---|---|---|
| UDPOWER C400 | 256Wh | 230Wh | About 1.4 full charges | One hoverboard, short trips, emergency top-ups | C400 product page |
| UDPOWER C600 | 596Wh | 536Wh | About 3.4 full charges | Multiple ride sessions, family day trips, camping | C600 product page |
| UDPOWER S1200 | 1,190Wh | 1,071Wh | About 6.8 full charges | Outdoor events, families, weekend use | S1200 product page |
| UDPOWER S2400 | 2,083Wh | 1,875Wh | About 11.9 full charges | Large power hub, multi-device use, extended backup | S2400 product page |
Swipe sideways on mobile to view the full table.
These numbers are planning estimates, not promises. You may get fewer full charges if the hoverboard charger is inefficient, the battery is cold, the hoverboard battery is old, or the power station is also running other devices.
Hoverboard charging safety checklist
Hoverboards use lithium battery systems, so charging habits matter. A safe charger does not make unsafe placement safe, and a safe location does not make the wrong charger safe.
| Do | Do not | Reason |
|---|---|---|
| Use the original charger or the manufacturer-approved replacement. | Do not use a random charger just because the plug fits. | Wrong output or polarity can damage the board or battery system. |
| Charge while you are awake and nearby. | Do not charge overnight or unattended. | You need to catch heat, smoke, odor, or charger failure early. |
| Charge on tile, concrete, or another hard non-flammable surface. | Do not charge on beds, rugs, sofas, paper, or near curtains. | Soft and flammable materials make a battery incident worse. |
| Let the hoverboard cool after riding. | Do not plug it in immediately if it feels hot. | Charging a hot lithium battery adds stress and risk. |
| Keep the board dry and clean. | Do not charge a wet hoverboard or wet charger. | Moisture can cause corrosion, shorts, or charging faults. |
| Check for a genuine UL 2272 certification mark when buying a hoverboard. | Do not assume “UL battery” means the whole hoverboard is UL 2272 compliant. | UL 2272 covers the complete electrical system, not just one component. |
Swipe sideways on mobile to view the full table.
Troubleshooting: why is my hoverboard not charging?
Start with the simple checks before assuming the battery is bad. Many “dead hoverboard” cases are actually charger, outlet, connector, or temperature issues.
Charger light stays green
The battery may already be full, the charger may not be connecting to the board, or the charger may be the wrong model. Check the port, connector fit, and charger label.
Charger light never turns on
Try another wall outlet. If the charger still has no light, stop using it and replace it with the manufacturer-approved charger.
Charger gets very hot
Warm is common. Too hot to touch is not. Unplug it, let everything cool, and do not continue charging with a questionable charger.
Hoverboard turns on but dies quickly
The battery may be aging, out of balance, or not reaching full charge. Short ride time after a full charge is often a battery health issue.
Board was stored for months and will not charge
Lithium batteries can drop too low after long storage. Do not force-charge or open the battery pack. Contact the manufacturer or a qualified repair provider.
Battery care: how to make a hoverboard battery last longer
Good charging habits improve both safety and battery life. You do not need complicated maintenance; you just need to avoid heat, deep discharge, and long periods at 100% or 0%.
- Avoid heat. Do not store or charge the hoverboard in a hot car, direct sun, or next to a heater.
- Do not ride to absolute empty every time. Repeated deep discharges are harder on lithium batteries.
- Unplug when full. A full charge is fine before riding, but long storage at 100% is not ideal.
- Store partially charged. If you will not ride for several weeks, store around mid-charge when possible.
- Top up during long storage. Check the battery every month or two so it does not sit fully drained.
- Keep the charging port clean and dry. Dust, moisture, and bent pins can create charging problems.
For off-grid weekends, a small battery powered outlet is often more useful than a spare hoverboard battery because it can recharge the hoverboard, phones, cameras, lights, and other small devices from the same power source.
FAQ: charging a hoverboard safely
Can I leave a hoverboard charging overnight?
No. Charge while you are awake and nearby, then unplug when the charger shows full. Overnight charging adds unnecessary risk and battery stress.
Should the hoverboard be on or off while charging?
Turn it off before charging. Charging while powered on can add heat and makes it harder to notice normal charger behavior.
Can I use any 42V charger for a hoverboard?
No. The output voltage is only one part of the match. You also need the correct current rating, connector, polarity, and manufacturer compatibility.
Why is my hoverboard charger red?
On many chargers, red means the battery is charging. Green usually means full or not connected. Always check your charger manual because light behavior can vary by model.
Can I ride immediately after charging?
Usually yes, but it is smart to unplug, let the board sit for a few minutes, and make sure there is no unusual heat, odor, or warning light before riding.
Can a portable power station charge a hoverboard?
Yes. Plug the hoverboard’s original charger into the power station’s AC outlet. Use a pure sine wave power station and make sure the AC output rating exceeds the charger wattage.
Which UDPOWER model is best for charging one hoverboard?
For one hoverboard, the UDPOWER C400 is usually the most practical match because its 400W pure sine wave AC output easily covers a typical hoverboard charger while staying compact.
How many watts does a hoverboard charger use?
Check the charger label. A common 42V 2A charger uses about 84W. A 42V 1.5A charger uses about 63W.
What should I do if my hoverboard smells hot or chemical-like while charging?
Unplug it only if it is safe to do so, move away from the hoverboard, keep it away from flammable items, and follow emergency guidance. Do not continue using the charger or board until it has been checked.
Does UL 2272 mean a hoverboard can never catch fire?
No. UL 2272 is an important safety standard for the whole electrical system, but no certification can guarantee that a product will never overheat or fail. Safe charging habits still matter.
Sources and official references
Need a safe way to recharge small ride-on devices away from home?
For one hoverboard, start with a compact pure sine wave power station. For family rides, camping weekends, and outdoor events, move up to a larger capacity model so the same unit can also support phones, lights, cameras, laptops, and emergency essentials.
Related Articles