Picnic Packing Guide: What to Bring to a Picnic
ZacharyWilliamLast updated:
What Should You Bring to a Picnic?
At minimum, bring food, water, a cooler with ice packs, a waterproof blanket, plates or food containers, utensils, napkins, hand sanitizer, sunscreen, insect repellent, a basic first-aid kit, and separate bags for trash and dirty dishes.
The easiest way to avoid overpacking is to organize everything into three zones: a cold zone for perishable food, a dry zone for tableware and shelf-stable items, and a comfort zone for the blanket, shade, games, and personal gear.

A good picnic should feel simple once you arrive. The work happens before you leave home: choosing food that travels well, keeping perishables cold, packing items in the order you will use them, and making sure the group has enough shade, water, seating, and cleanup supplies.
This guide is designed for park picnics, beach picnics, family outings, picnic dates, road-trip stops, and larger outdoor gatherings. It includes a complete packing list, food-safety rules, realistic quantities, cooler organization, weather planning, and optional portable-power setups.
Quick Picnic Packing Checklist
Start with the essentials below, then add items based on the location, weather, group size, and planned activities.
| Category | What to Pack | Why It Matters | Priority |
|---|---|---|---|
| Food | Sandwiches, wraps, salads, fruit, snacks, dessert | Choose foods that travel well and require minimal assembly | Essential |
| Drinks | Water, chilled beverages, reusable cups | Water should be packed before optional drinks | Essential |
| Cold storage | Insulated cooler, ice packs, cooler thermometer | Keeps perishable food at a safer temperature | Essential for perishables |
| Seating | Waterproof blanket, ground tarp, portable chairs | Protects against wet grass, sand, dirt, and uneven ground | Essential |
| Tableware | Plates, cups, utensils, serving spoon, cutting board | Prevents awkward serving and sharing | Essential |
| Cleanup | Napkins, paper towels, wet wipes, trash bags, dish bag | Makes packing out food scraps and dirty items easier | Essential |
| Personal protection | Sunscreen, insect repellent, hats, sunglasses | Helps the group stay comfortable outdoors | Essential in warm weather |
| Safety | First-aid kit, medications, allergy supplies | Prepares the group for small cuts, bites, or reactions | Essential |
| Weather | Umbrella, canopy, light jacket, rain layer | Provides shade or protection from changing conditions | Condition-dependent |
| Entertainment | Cards, ball, frisbee, book, portable speaker | Keeps the outing enjoyable after the meal | Optional |
| Power | Power bank or portable power station | Supports phones, speakers, fans, lights, and portable fridges | Optional |
Printable Last-Minute Checklist
- Food containers are fully closed
- Cold food is already chilled before entering the cooler
- Water and drinks are packed
- Ice packs or bagged ice are in the cooler
- Blanket has a waterproof underside
- Utensils match the menu
- Serving spoon, tongs, or knife are included when needed
- Napkins, wipes, and hand sanitizer are packed
- Trash and dirty-dish bags are packed separately
- Sunscreen and insect repellent are easy to reach
- First-aid kit and personal medications are included
- Park rules, parking, restrooms, and weather have been checked
- Phones, speakers, lights, and batteries are charged
Plan the Picnic Before You Pack
Packing becomes much easier when you answer four questions before selecting food or gear.
1. How many people are coming?
Count adults and children separately. Children may eat smaller portions, but they often require more wipes, water, shade, activities, and backup clothing.
2. How far is the picnic area from the car?
A picnic table beside a parking lot allows heavier coolers and chairs. A picnic spot reached by a 20-minute walk calls for lighter food, backpack-style coolers, compact blankets, and fewer glass containers.
3. How long will you stay?
A two-hour lunch requires less food, ice, power, and entertainment than an afternoon gathering that continues after sunset.
4. What facilities are available?
Check for picnic tables, grills, drinking water, restrooms, trash cans, electrical outlets, shade, pet restrictions, fire rules, and parking limitations before leaving home.
The Three-Zone Packing System
| Zone | Container | What Goes Inside | Packing Rule |
|---|---|---|---|
| Cold zone | Insulated cooler | Meat, dairy, cut fruit, prepared salads, dips, cold drinks | Open as little as possible and keep it out of direct sun |
| Dry zone | Tote, basket, or crate | Plates, utensils, bread, chips, napkins, condiments, trash bags | Place crushable food at the top |
| Comfort zone | Backpack or separate carry bag | Blanket, sunscreen, games, jackets, first aid, electronics | Keep frequently used items near the opening |
Keeping these zones separate prevents wet ice from reaching dry food, stops tableware from becoming buried under drinks, and reduces the number of times the food cooler must be opened.
What Food Should You Bring to a Picnic?
The best picnic foods are easy to transport, easy to portion, and still enjoyable after sitting in a container for an hour or two. Avoid building the entire menu around foods that must remain crisp, perfectly plated, or piping hot.
Reliable Picnic Food Categories
| Food Type | Good Options | Packing Advice | Cold Storage? |
|---|---|---|---|
| Main dish | Sandwiches, wraps, pita pockets, cold fried chicken | Wrap individual portions and keep wet ingredients controlled | Usually yes |
| Salad | Pasta salad, grain salad, slaw, bean salad | Pack dressing separately when texture matters | Yes for prepared salads |
| Fruit | Grapes, berries, oranges, apples, melon | Wash and dry at home; chill cut fruit | Cut fruit should stay cold |
| Vegetables | Carrots, cucumber, bell pepper, cherry tomatoes | Use firm vegetables that do not bruise easily | Recommended |
| Snacks | Crackers, pretzels, trail mix, popcorn, chips | Use rigid containers if bags may be crushed | No |
| Dips | Hummus, salsa, yogurt dip, guacamole | Use leakproof containers and pack upright | Yes |
| Dessert | Cookies, brownies, bars, whole fruit | Avoid delicate frosting that melts or sticks | Usually no |
| Drinks | Water, lemonade, iced tea, sparkling water | Chill before packing instead of relying on the cooler to chill them | Recommended |
Starting Quantities for a Three- to Four-Hour Picnic
These are practical starting points rather than strict serving rules. Increase quantities for hot weather, active games, teenagers, or a longer stay.
| Item | Suggested Starting Amount Per Adult | Suggested Starting Amount Per Child | Adjustment |
|---|---|---|---|
| Water | 24–32 fl oz, plus extra | 16–24 fl oz, plus extra | Bring more for heat, sports, or limited on-site water |
| Main dish | 1 large sandwich or 1–2 wraps | Half to 1 sandwich | Add 10% for a group with uncertain attendance |
| Side dish | About 1 cup | About 1/2 cup | Use smaller servings when offering multiple sides |
| Fruit or vegetables | 1–2 portions | 1 portion | Whole fruit reduces preparation and cleanup |
| Snack | 1–2 portions | 1–2 portions | Pack some shelf-stable snacks as backup food |
| Dessert | 1 portion | 1 portion | Choose items that tolerate outdoor temperatures |
Three Easy Picnic Menus
Low-Mess Park Lunch
- Turkey or vegetable wraps
- Grapes and whole apples
- Individual bags of pretzels
- Cookies or oat bars
- Water and canned sparkling water
Family Picnic
- Pre-portioned sandwiches
- Pasta salad in a sealed container
- Carrot sticks and hummus
- Watermelon pieces kept cold
- Brownies
- Water, juice, and extra ice
Picnic Date
- Baguette or crackers
- Pasteurized cheese kept chilled
- Prepared fruit
- Olives or a small salad
- Cookies or chocolate that will not melt easily
- Chilled nonalcoholic drinks in reusable cups
How to Keep Picnic Food Safe
Outdoor meals need more temperature control than food served at home. Perishable foods include meat, seafood, dairy products, cooked leftovers, prepared salads, dips, and cut fruit.
| Food-Safety Step | What to Do | Why | Source |
|---|---|---|---|
| Keep cold food cold | Use an insulated cooler with enough ice or frozen packs | Cold perishable food should remain at 40°F or below | USDA Food Safety |
| Watch the clock | Return perishables to cold storage promptly | The usual limit is two hours, or one hour above 90°F | CDC Food Safety |
| Use a thermometer | Place a cooler thermometer where it can be read easily | Ice remaining in the cooler does not automatically confirm a safe temperature | USDA Tailgating Safety |
| Separate raw food | Seal raw meat securely and keep it away from ready-to-eat food | Helps prevent leaking juices from contaminating other food | USDA Tailgating Safety |
| Wash hands | Use running water when available or bring sanitizer and wipes | Reduces contamination before preparing or eating food | CDC Food Safety |
| Discard questionable food | Do not taste food to determine whether it is safe | Appearance and smell do not reliably show harmful bacterial growth | USDA Danger Zone Guide |
Foods That Need Extra Attention
- Deli meat and prepared sandwiches containing meat or cheese
- Egg, tuna, chicken, pasta, and potato salads
- Milk, yogurt, soft cheese, and dairy-based dips
- Cooked chicken, burgers, seafood, and leftovers
- Cut watermelon, cantaloupe, berries, and other cut fruit
- Hummus, guacamole, salsa, and refrigerated condiments
Shelf-stable crackers, unopened snack bars, whole uncut fruit, bread, cookies, nuts, and sealed dry snacks are easier to manage when reliable cold storage is not available.
How to Pack a Picnic Cooler Correctly
A cooler works best when it preserves food that is already cold. It is less effective when used to chill warm drinks, room-temperature salads, or freshly prepared hot food.
Step-by-Step Cooler Packing Order
- Pre-chill the cooler. Place ice packs inside before packing, especially if the cooler has been stored in a warm garage or vehicle.
- Chill all food and drinks first. Refrigerate them overnight whenever possible.
- Add a bottom layer of ice packs. This creates a cold base beneath the food.
- Pack the items used last at the bottom. This prevents unnecessary unpacking at the picnic site.
- Keep raw meat in a separate sealed section. Use leakproof containers or double bags.
- Fill empty spaces. Additional ice packs or frozen water bottles reduce warm air pockets.
- Place frequently used food near the top. Snacks and the first meal should be accessible without emptying the cooler.
- Put a thermometer inside. Check that the cooler remains at 40°F or below.
- Keep the cooler shaded. A tree, canopy, or reflective cover can reduce direct solar heating.
Cooler Packing Mistakes to Avoid
| Mistake | What Happens | Better Approach |
|---|---|---|
| Loading warm cans into the food cooler | The ice must chill the drinks instead of maintaining food temperature | Refrigerate drinks before packing |
| Leaving large empty spaces | Warm air circulates whenever the lid opens | Fill gaps with ice packs or frozen water bottles |
| Opening the cooler repeatedly | Cold air escapes and warm air enters | Organize food by meal and use a separate drink cooler |
| Placing the cooler in direct sun | The exterior and interior warm more quickly | Move it under shade and keep the lid closed |
| Assuming melted ice means food is still safe | Temperature may have risen above the safe cold-holding range | Use a cooler thermometer |
Comfort, Weather, and Safety Gear
Food is only one part of picnic planning. Wet ground, strong sun, wind, insects, sudden rain, or a lack of seating can end an outing earlier than expected.
Blanket and Seating
- Choose a blanket with a waterproof or water-resistant underside.
- Bring a small tarp when the ground has recently been wet.
- Add folding chairs for guests who may have difficulty sitting on the ground.
- Use a compact table or tray for drinks and unstable food containers.
- Bring an extra towel for spills, damp seats, or sandy feet.
Weather-Based Packing Guide
| Condition | Add to Your Packing List | Change to Make |
|---|---|---|
| Hot and sunny | Extra water, canopy, hats, sunscreen, more ice | Choose a shaded location and shorten food serving time |
| Windy | Blanket stakes, clips, weighted containers, lidded cups | Avoid loose paper plates and lightweight decorations |
| Cool weather | Light jackets, warm drinks, insulated seating layer | Pack foods that remain pleasant when cool |
| Possible rain | Rain jackets, waterproof bags, canopy, towels | Choose a site near a shelter or vehicle |
| High insect activity | Repellent, food covers, sealed trash bags | Keep food closed except during serving |
| Evening picnic | Lanterns, flashlights, warm layers, charged phones | Plan the cleanup before visibility becomes poor |
Sun and Insect Protection
Pack sunscreen where it can be reached without opening the food cooler. Follow the product directions for application and reapplication. Insect repellent should also be used according to its label and applied only as directed.
The U.S. Environmental Protection Agency recommends reading and following repellent label directions, avoiding application near the eyes and mouth, and not spraying directly onto the face. Review EPA insect-repellent guidance.
Basic First-Aid Kit
- Adhesive bandages in several sizes
- Antiseptic wipes
- Gauze and medical tape
- Tweezers
- Disposable gloves
- Cold pack
- Any personal medication required by group members
- Allergy medication or prescribed emergency supplies when applicable
What to Bring for Different Types of Picnics
| Picnic Type | Add These Items | Items to Limit | Best Packing Style |
|---|---|---|---|
| Picnic date | Compact blanket, reusable cups, small serving board, napkins | Oversized coolers and complicated dishes | One cooler bag plus one tote |
| Family picnic | Extra wipes, kid-friendly cups, backup snacks, games, spare clothes | Glass containers and difficult-to-serve foods | Food cooler, dry crate, family gear bag |
| Beach picnic | Sand-resistant mat, canopy, towels, sealed food containers | Loose napkins and foods that collect sand easily | Hard-sided cooler and zippered bags |
| Hiking picnic | Lightweight food, water, compact first aid, rain layer | Heavy dishes, large chairs, glass, bulky appliances | Backpack and insulated lunch bag |
| Road-trip picnic | Car-friendly cooler, cleaning wipes, trash bag, charging cable | Containers that leak when tilted | Cooler secured in the cargo area |
| Large group picnic | Food labels, serving utensils, multiple trash bags, extra water | One shared cooler opened by everyone | Separate food, drink, and supply stations |
| Evening picnic | Lanterns, charged phones, jackets, reflective gear | Unprotected candles or open flames where prohibited | Accessible lighting and cleanup bag |
| Dog-friendly picnic | Water bowl, leash, waste bags, towel, pet food | Unsafe human foods within reach of pets | Separate pet bag and securely closed food containers |
Check Local Rules Before Arriving
Rules differ between city parks, state recreation areas, beaches, and national parks. Confirm whether the location allows pets, grills, alcohol, glass, amplified music, canopies, decorations, or large group setups.
Pack out all trash, food scraps, used wipes, and disposable tableware. Food scraps can attract wildlife even when they appear biodegradable. The National Park Service advises visitors to pack out everything they bring and to secure food around wildlife. Read the National Park Service Leave No Trace guidance.
Do You Need Portable Power for a Picnic?
A small picnic with cold food and fully charged phones may only require a pocket-size power bank. A portable power station becomes useful when the outing includes a powered cooler, portable fridge, fan, laptop, camera equipment, lighting, multiple phones, a projector, or a larger speaker.
Choose a power station by checking two separate numbers:
- Output in watts: The station must support the appliance's operating wattage and any startup surge.
- Capacity in watt-hours: This determines approximately how long the station can keep the device running.
Typical Picnic Power Loads
| Device | Typical Planning Range | Best Power Source | Planning Note |
|---|---|---|---|
| Phone charging | 5–20W per phone | USB power bank or power station | Actual energy per full charge depends on phone battery and charger losses |
| Bluetooth speaker | 10–40W while operating or charging | Small power station | Larger party speakers can use considerably more power |
| Portable fan | 15–60W | Small or medium power station | USB fans generally use less than AC box fans |
| LED lighting | 5–30W | Power bank or power station | Rechargeable lights may not need continuous power |
| 12V portable fridge | About 35–60W when the compressor is running | Medium power station | Average consumption varies because the compressor cycles |
| Laptop | 30–100W | USB-C or AC power station | Gaming and video editing increase consumption |
| Small blender | 200–500W | Power station with suitable AC output | Check rated watts and startup demand before use |
| Coffee maker | 600–1,200W | High-output power station | High wattage but usually operated for only a few minutes |
For a deeper explanation of outdoor device sizing, see the portable power setup guide for picnics, fishing, and road trips .
When running a portable refrigerator, a direct 12V connection can be more efficient than using its AC adapter because it avoids unnecessary inverter conversion. The camping fridge power guide explains battery, solar, connection, and runtime considerations in more detail.
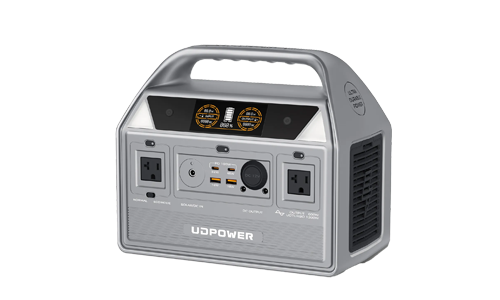
Recommended UDPOWER Portable Power Stations for Picnics
The right model depends on how far it must be carried, which devices will run, and how long the picnic will last. A larger battery is not always the better picnic choice if the nearest parking area is far from the site.
| Model | Capacity | Rated AC Output | Weight | Best Picnic Use | Official Details |
|---|---|---|---|---|---|
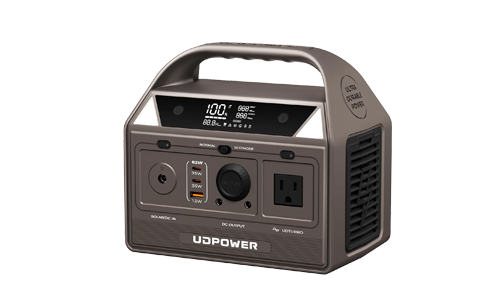
| UDPOWER C400 | 256Wh | 400W | Approximately 6.88 lbs | Phones, lights, speaker, fan, camera batteries, light cooler use | View C400 |
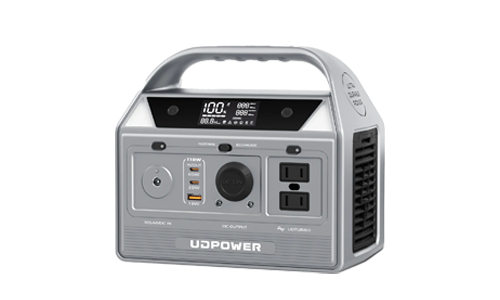
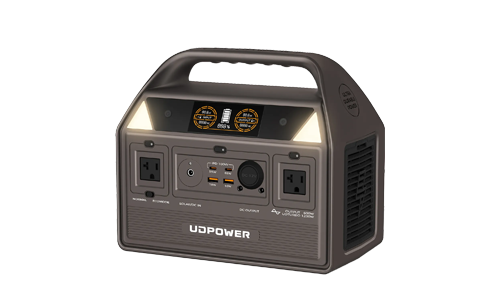
| UDPOWER C600 | 596Wh | 600W | Approximately 12.3 lbs | Longer outings, group charging, fan, laptop, portable fridge | View C600 |
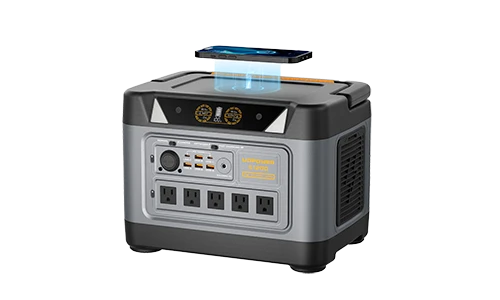
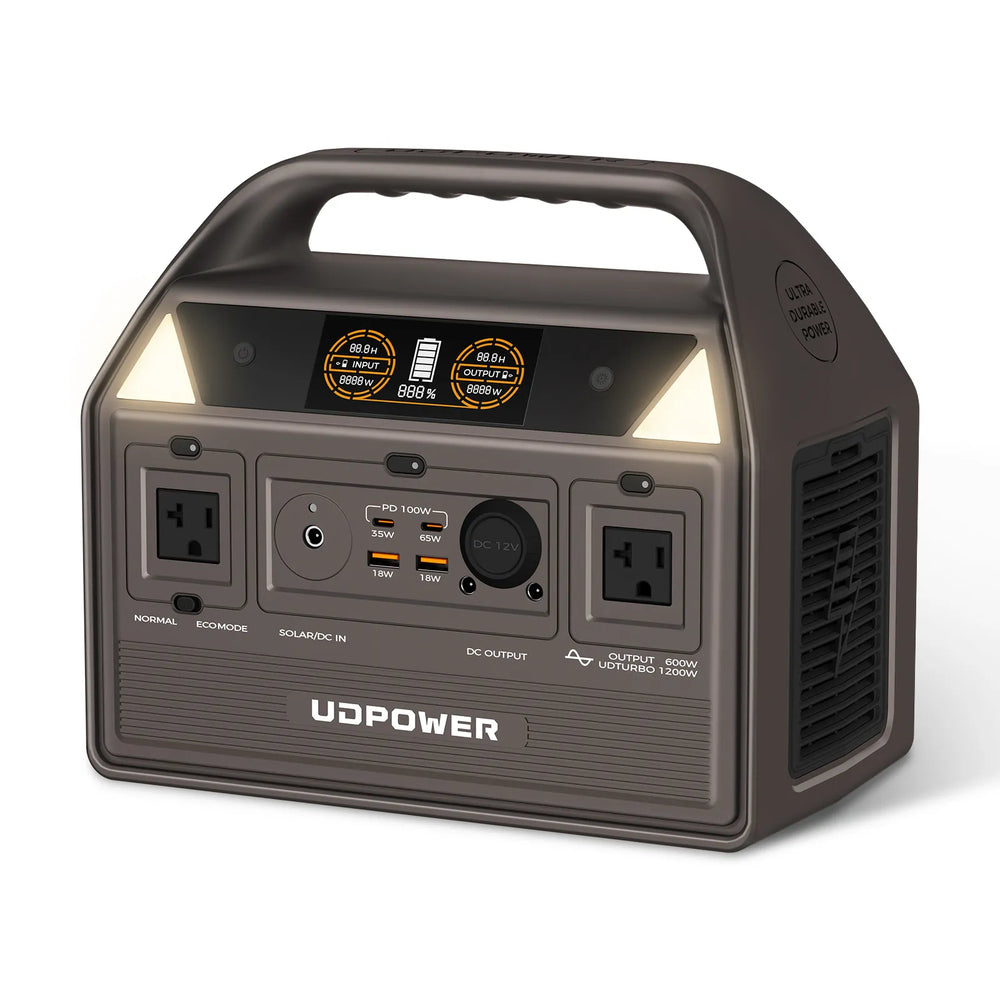
| UDPOWER S1200 | 1,190Wh | 1,200W | Approximately 26 lbs | Large gatherings, longer fridge use, coffee makers, multiple appliances | View S1200 |
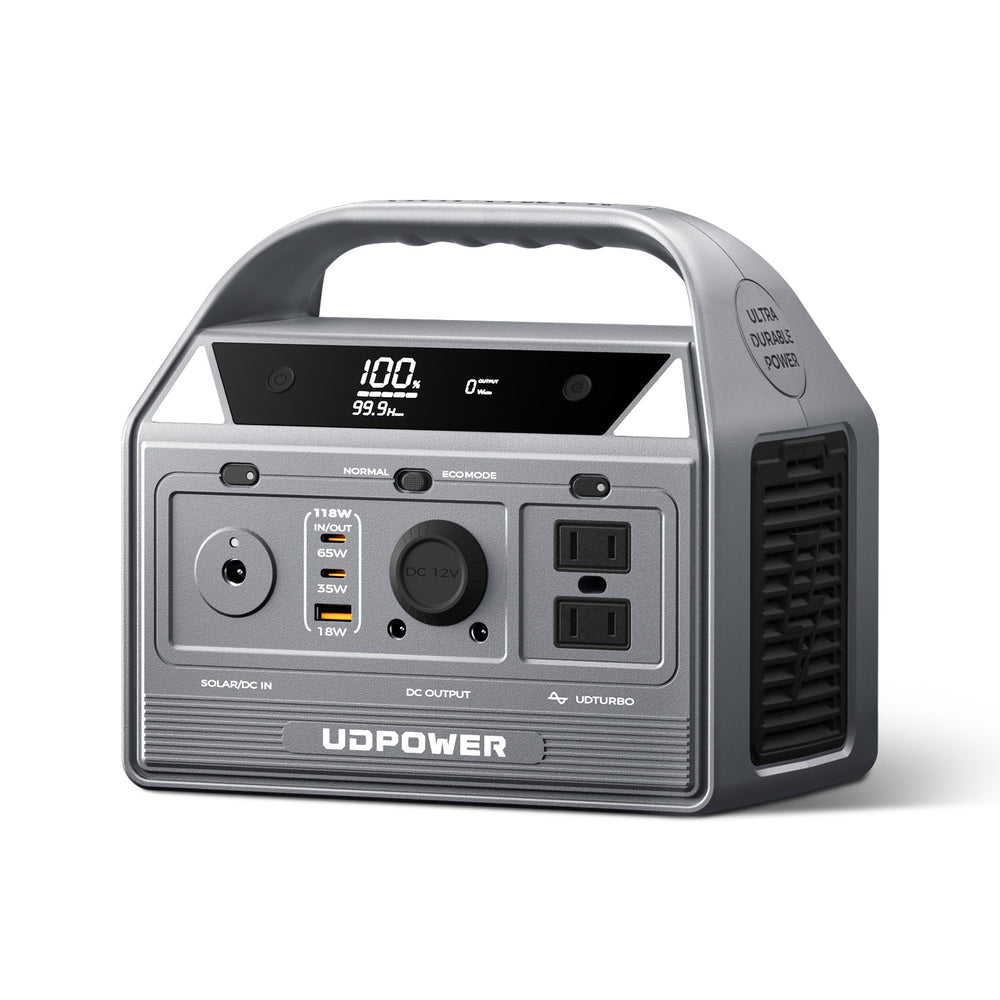
Best for a Lightweight Day Picnic: UDPOWER C400
The C400 is the most practical option when carrying weight matters. Its 256Wh capacity is suitable for personal electronics, a small speaker, LED lighting, camera batteries, and low-wattage fans. Its 400W rated AC output also provides more flexibility than a basic USB power bank.
- Capacity: 256Wh
- Rated AC output: 400W
- Peak output: Up to 800W
- Battery: LiFePO4
- Weight: Approximately 6.88 lbs
- Solar input: Up to 150W
- Best fit: Day trips and small-group picnics
Best All-Around Picnic Choice: UDPOWER C600
The C600 provides a useful balance between portability and runtime. Its 596Wh battery and 600W rated output make it a better fit for a group picnic with multiple phones, a laptop, lighting, a fan, or a compact 12V refrigerator.
- Capacity: 596Wh
- Rated AC output: 600W
- Peak output: Up to 1,200W
- Battery: LiFePO4 with 4,000+ cycles
- Weight: Approximately 12.3 lbs
- Outputs: AC, USB-C, USB-A, and 12V car outlet
- Best fit: Group outings and portable-fridge setups
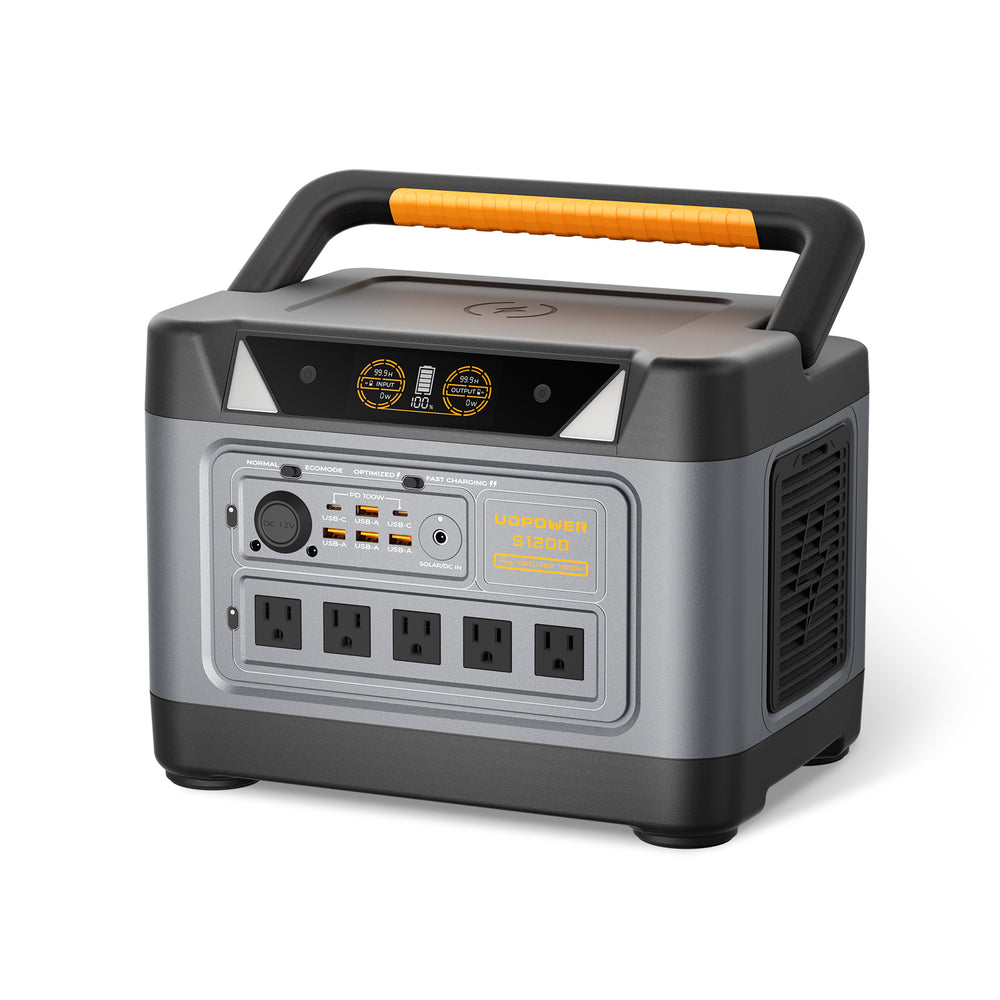
Best for Large or Appliance-Heavy Picnics: UDPOWER S1200
The S1200 is intended for gatherings where runtime and output matter more than one-handed portability. It can support a portable fridge, multiple charging devices, lighting, fans, and selected cooking or beverage appliances whose rated power remains within the station's output limits.
- Capacity: 1,190Wh
- Rated AC output: 1,200W pure sine wave
- Surge support: Up to 1,800W
- Battery: LiFePO4 with 4,000+ cycles
- Weight: Approximately 26 lbs
- Solar input: Up to 400W
- Best fit: Large groups, long outings, and higher-power appliances
Estimated Picnic Device Runtime
The estimates below use 90% conversion efficiency. They are simplified planning figures, not guaranteed operating times. Real runtime changes with temperature, battery condition, inverter use, device cycling, cable losses, and actual device wattage.
| Device Load | C400 256Wh |
C600 596Wh |
S1200 1,190Wh |
Planning Note |
|---|---|---|---|---|
| 10W LED light | About 23.0 hours | About 53.6 hours | About 107.1 hours | Most picnic lights are used for only part of the evening |
| 20W speaker | About 11.5 hours | About 26.8 hours | About 53.6 hours | Check the speaker's real charging or operating input |
| 30W portable fan | About 7.7 hours | About 17.9 hours | About 35.7 hours | Higher fan speed may increase consumption |
| 45W average fridge load | About 5.1 hours | About 11.9 hours | About 23.8 hours | Compressor cycling can make actual runtime higher or lower |
| 60W laptop load | About 3.8 hours | About 8.9 hours | About 17.9 hours | Charging a sleeping laptop differs from continuous active use |
| 300W appliance | About 46 minutes | About 1.8 hours | About 3.6 hours | Many kitchen devices run for minutes rather than continuously |
For broader battery-capacity planning, read How Many Wh Do I Need for Camping? The same method can be applied to longer picnics, tailgates, outdoor movie nights, and road trips.
Picnic Packing Timeline
One or Two Days Before
- Check the weather forecast and location rules.
- Confirm attendance and dietary restrictions.
- Freeze ice packs or water bottles.
- Charge phones, speakers, lights, and portable power stations.
- Prepare a backup location in case of rain or closures.
The Night Before
- Chill drinks and all perishable ingredients.
- Wash and dry fruit and vegetables.
- Prepare foods that hold their texture overnight.
- Pack the dry-food and tableware tote.
- Place the blanket, chairs, and canopy near the door.
Immediately Before Leaving
- Pack the cooler with cold food and frozen packs.
- Add a cooler thermometer.
- Fill reusable water containers.
- Check that utensils match every dish being served.
- Load the vehicle with the items needed first placed last.
When You Arrive
- Move the food cooler into shade.
- Set up the blanket or seating before opening food.
- Create one location for hand cleaning and one for trash.
- Serve only the amount of perishable food likely to be eaten promptly.
- Keep remaining food in the closed cooler.
Before Leaving
- Discard food that has exceeded safe time or temperature limits.
- Seal leftovers that are still safe and return them to the cooler.
- Separate trash, recyclables, and dirty reusable dishes.
- Check the grass, table, and surrounding area for small scraps.
- Count phones, keys, wallets, chargers, and reusable containers.
Common Picnic Packing Mistakes
1. Choosing a Menu Before Checking the Location
A menu that works beside a parking lot may be impractical at a picnic area reached by stairs, a long trail, or public transportation. Check access before deciding on coolers, appliances, and serving dishes.
2. Bringing Too Many “Just in Case” Items
Extra chairs, large serving boards, decorations, full-size condiment bottles, and multiple cooking devices add weight quickly. Bring items that solve a likely problem, not every possible problem.
3. Forgetting Serving Tools
People often remember forks but forget a serving spoon, tongs, knife, bottle opener, cutting board, or spoon for a dip. Review each dish and ask how it will be opened, served, and eaten.
4. Using One Bag for Clean and Dirty Items
Bring a separate leak-resistant bag for used utensils, reusable plates, wet towels, and food containers. This prevents the rest of the picnic supplies from becoming dirty on the trip home.
5. Packing the Cooler Too Early
Load the cooler shortly before departure instead of leaving it in a warm vehicle or kitchen for an extended period.
6. Depending on Electronics Without Testing Them
Charge and test speakers, fans, lights, charging cables, and adapters at home. Confirm that the appliance plug fits the power source and that its rated wattage is within the power station's output limit.
7. Forgetting the Cleanup Plan
Do not assume the site has trash cans. Bring more than one strong bag so food waste, recyclables, and dirty reusable supplies can be separated.
Frequently Asked Questions
What are the five most important things to bring to a picnic?
The five basics are food, water, a cooler or insulated bag, a waterproof blanket, and cleanup supplies. When bringing perishable food, include enough ice packs to keep it at 40°F or below.
What should I bring to a picnic besides food?
Bring water, a blanket, plates, cups, utensils, napkins, sanitizer, sunscreen, insect repellent, trash bags, a first-aid kit, and weather-appropriate clothing. Optional items include chairs, a canopy, games, a speaker, and portable power.
What food is easiest to bring to a picnic?
Sandwiches, wraps, firm fruit, cut vegetables, crackers, trail mix, cookies, brownies, and sealed drinks are easy to portion and transport. Perishable fillings, dairy products, prepared salads, and cut fruit still need cold storage.
How do you pack a picnic without a basket?
Use an insulated cooler for cold food, a reusable grocery tote or crate for dry supplies, and a backpack for personal items. These containers are often more practical than a traditional wicker basket.
How much water should I bring to a picnic?
For a three- to four-hour outing, 24–32 fluid ounces per adult is a reasonable starting amount, but additional water should be carried for hot weather, physical activity, children, pets, or locations without drinking water.
How long can picnic food stay out?
Perishable food should not remain without temperature control for more than two hours. When the outdoor temperature is above 90°F, the limit is one hour.
How do I keep food cold during a picnic?
Chill food before packing, use an insulated cooler with plenty of frozen packs, fill empty spaces, keep the cooler shaded, minimize opening, and monitor the interior with a cooler thermometer.
Should drinks and food go in the same cooler?
They can for a small picnic. For a larger group, separate coolers are better because the drink cooler will be opened much more frequently than the food cooler.
What should I bring to a picnic date?
Bring a compact waterproof blanket, a small cooler, an easy two-person meal, water, reusable cups, napkins, a trash bag, sunscreen, and one simple activity such as cards, a book, or a small speaker.
What should I bring to a picnic with children?
Add spill-resistant cups, extra water, wipes, simple snacks, sunscreen, a basic first-aid kit, spare clothing, shade, and age-appropriate games. Avoid fragile glass containers and foods that are difficult to portion.
Do I need a portable power station for a picnic?
Not for a basic picnic. A portable power station is useful when running a portable fridge, fan, lighting, larger speaker, laptop, camera equipment, or several charging devices for an extended period.
Which portable power station is best for a picnic?
The UDPOWER C400 is well suited to lightweight day trips, the C600 offers a stronger balance of portability and runtime for group picnics, and the S1200 is better for large gatherings or higher-power appliances. Always compare the appliance wattage with the station's rated output before use.
Related Outdoor Power Guides
Choose the Right Power Setup for Your Next Picnic
A compact station can keep phones, speakers, lights, and fans running during a day trip, while a higher-capacity model can support a portable fridge or a larger group for longer.
Compare capacity, output, weight, ports, and solar-charging options before choosing a model.
View Portable Power StationsYou can also explore UDPOWER solar generator kits for outdoor trips that may require daytime recharging.