How to Set Up a Fishing Rod and Reel: A Step-by-Step Beginner’s Guide
ZacharyWilliamLast updated:
A new fishing rod can look deceptively simple until you are holding a reel, a loose spool of line, several pieces of tackle, and no clear idea which part goes where. The good news is that a basic spinning setup can be assembled, spooled, and rigged in about 15 to 30 minutes once you understand the main fishing rod parts and follow the correct order.
Quick Answer: How Do You Set Up a Fishing Rod and Reel?
Assemble the rod sections, align the guides, secure the reel in the reel seat, spool the reel with compatible fishing line, run the line through every guide, tie on a hook or lure, add a sinker and bobber when needed, and set the drag so line can leave the spool under firm pressure.
For most beginners, the easiest starting setup is a 6- to 7-foot spinning rod, a matching spinning reel, 6- to 10-pound monofilament line, and a simple hook-and-bobber rig.

Fishing Rod Parts Every Beginner Should Recognize
You do not need to memorize every technical term before going fishing. However, recognizing the main fishing rod parts makes the setup process easier and helps you spot problems before they cause a lost lure, tangled line, or damaged rod.
| Fishing rod part | What it does | What to check during setup |
|---|---|---|
| Rod tip | The narrowest and most flexible end of the rod. | Check that it is straight, undamaged, and not trapped under anything. |
| Tip-top guide | The final guide at the very end of the rod. | Make sure the line passes through it before tying on tackle. |
| Guides | Rings that direct the line from the reel to the rod tip. | Align every guide and inspect the inserts for cracks or sharp edges. |
| Blank | The main shaft of the rod that bends under load. | Look for cracks, deep scratches, or crushed areas. |
| Ferrules | The joining points on a two-piece or multi-piece rod. | Seat them firmly without forcing them completely together. |
| Hook keeper | A small loop used to secure a hook while transporting the rod. | Use it instead of hooking tackle into a guide insert. |
| Reel seat | The section that holds the reel foot against the rod. | Tighten it until the reel no longer shifts, but do not overtighten it. |
| Foregrip | The grip in front of the reel seat on rods that include one. | Check that it is secure and comfortable to hold. |
| Rear grip | The handle section behind the reel. | Keep it clean and dry for better control. |
| Butt cap | The protective end at the bottom of the handle. | Confirm it is secure before placing the rod on the ground. |
Main Parts of a Spinning Reel
This guide focuses primarily on spinning reels because they are easy to cast, widely available, and less prone to severe backlash than baitcasting reels.
| Reel part | Purpose | Common beginner mistake |
|---|---|---|
| Reel foot | Slides into the rod’s reel seat. | Mounting it loosely so the reel twists while casting. |
| Reel body | Houses the gears and main internal components. | Holding the rod by the reel body during transport. |
| Handle | Turns the rotor and retrieves line. | Forcing the handle when the line is snagged. |
| Spool | Stores the fishing line. | Overfilling it or winding line on too loosely. |
| Bail | Opens to release line and closes to retrieve it. | Forgetting to open it before tying line to the spool. |
| Line roller | Guides line onto the spool as you reel. | Running the line outside the roller instead of underneath the bail. |
| Drag knob | Controls how much pressure is required to pull line from the spool. | Tightening the drag completely, which can break the line. |
| Anti-reverse switch | Prevents the handle from turning backward on reels that include one. | Accidentally switching it off and thinking the reel is broken. |
A useful visual reference for spinning reel anatomy is available from Take Me Fishing.
What You Need Before Setting Up Your Fishing Rod
- A spinning rod or rod-and-reel combo
- A compatible spinning reel
- Monofilament, fluorocarbon, or braided fishing line
- Small scissors or line cutters
- Needle-nose fishing pliers
- Hooks or artificial lures
- Split-shot sinkers
- A clip-on or sliding bobber
- A clean cloth for holding the line under tension
- A practice casting plug for safe testing
Match the Rod, Reel, Line, and Lure Before Assembly
Many setup problems begin before the reel is attached. The rod, reel, line, and lure should be reasonably matched. Using line that is much heavier than the rod rating can reduce casting performance, while line that is too light for the target fish or cover may break easily.
The Three-Label Compatibility Check
Before spooling the reel, read these three labels:
- Rod label: Usually printed above the handle. It lists rod length, power, line rating, and recommended lure weight.
- Reel spool: Usually lists how many yards of several line strengths the reel can hold.
- Fishing line package: Lists the line type, pound test, diameter, and total length.
Choose a line strength that appears within the rod’s printed line range and is also listed on the reel spool. This simple overlap check prevents most beginner compatibility problems.
| Fishing situation | Beginner-friendly rod | Typical line choice | Example tackle |
|---|---|---|---|
| Panfish from a dock or pond bank | 5½- to 6½-foot light spinning rod | 4- to 6-pound monofilament | Small hook, split shot, and bobber |
| Trout in lakes or slow streams | 6- to 7-foot light or medium-light spinning rod | 4- to 8-pound monofilament or fluorocarbon | Small spinner, spoon, bait hook, or float rig |
| General freshwater fishing | 6½- to 7-foot medium spinning rod | 6- to 10-pound monofilament | Soft plastic, small crankbait, or bobber rig |
| Bass around moderate cover | 6½- to 7-foot medium spinning rod | 8- to 12-pound mono or fluorocarbon | Worm, jig, spinnerbait, or small topwater lure |
| Light inshore saltwater fishing | 7-foot medium spinning rod rated for saltwater use | 10- to 20-pound braid with a suitable leader | Jig, shrimp imitation, spoon, or live-bait rig |
These are starting ranges rather than universal rules. Always prioritize the ratings printed on your equipment and choose tackle for the fish, water, cover, current, and local regulations you expect to encounter.
How to Set Up a Fishing Rod and Reel Step by Step
1 Identify the Rod and Reel Type
Confirm that you have a spinning rod and spinning reel. A spinning rod usually has a noticeably larger first guide near the reel seat. When assembled correctly, the reel and guides hang below the rod.
Do not mount a spinning reel on a baitcasting rod simply because the reel foot fits. Casting rods are designed with different guide sizes, placement, and handle geometry.
2 Assemble the Rod Sections
- Lay the rod sections on a clean surface.
- Inspect the ferrules for sand, grit, or damage.
- Insert the thinner male ferrule into the larger female ferrule.
- Press the sections together with a gentle twisting motion.
- Rotate the sections until every guide forms one straight line.
A small visible gap may remain at some ferrule connections. Do not force the pieces together until no gap remains unless the rod manufacturer specifically instructs you to do so.
3 Attach the Reel to the Rod
- Loosen the reel-seat locking ring.
- Place the front and rear ends of the reel foot into the reel-seat hoods.
- Turn the locking ring until the reel is held securely.
- Hold the rod normally and check for movement.
The reel should not rock, twist, or slide. Tighten the seat by hand only. Pliers can damage the locking ring and make the reel difficult to remove.
Most spinning reels allow the handle to be installed on either side. Place it on the side that feels natural. Many right-handed anglers hold the rod in the right hand and reel with the left, but personal comfort is more important than convention.
4 Choose the Fishing Line
| Line type | Advantages | Limitations | Best beginner use |
|---|---|---|---|
| Monofilament | Affordable, forgiving, easy to knot, and naturally buoyant | More stretch and line memory than braid | The simplest first line for general freshwater fishing |
| Fluorocarbon | Low visibility underwater and good abrasion resistance | Stiffer and sometimes harder to manage on small spinning reels | Leader material or a full spool on a properly matched reel |
| Braided line | Thin diameter, high strength, low stretch, and strong sensitivity | Can slip on a bare spool and usually requires a leader | Fishing vegetation, long casts, or stronger fish after basic practice |
For a first freshwater setup, 6- or 8-pound monofilament is usually easy to handle and works with many medium-light or medium spinning combos. Check the ratings on your own rod and reel before choosing.
5 Spool the Spinning Reel
- Place the rod on a clean surface and run the line through the large guide closest to the reel.
- Open the reel’s bail before attaching the line. If you tie the knot with the bail closed, the reel will not retrieve the line correctly.
- Wrap the line around the center of the reel spool and secure it with an arbor knot.
- Trim the tag end close to the knot.
- Close the bail by hand.
- Hold the line lightly between a folded cloth or your fingers several inches above the reel.
- Turn the handle slowly while maintaining steady tension on the line.
- Stop when the line sits approximately 1/8 inch below the spool lip.
Complete arbor-knot instructions are available from Take Me Fishing.
How to Prevent Line Twist While Spooling
Place the filler spool flat on the floor and reel 10 to 15 handle turns. Lower the rod tip and briefly reduce tension. If the line forms loose spirals or twists around itself, flip the filler spool over and continue.
Keep the line under moderate tension, but do not squeeze so hard that the line becomes hot. Uneven or loose line can dig into lower layers and form knots during the first cast.
See the fishing-pole stringing guide for another beginner-oriented reference.
6 Run the Line Through the Rod Guides
- Open the bail so line can leave the spinning reel freely.
- Pull out enough line to reach beyond the rod tip.
- Pass it through the largest guide nearest the reel.
- Continue through every guide in order.
- Finish by passing the line through the tip-top guide.
- Close the bail by hand.
Do not skip a guide. A skipped guide changes the way the rod bends and can place excess stress on the blank. Also confirm that the line is running beneath the bail wire and across the line roller.
7 Tie On a Hook or Lure
The improved clinch knot is a practical first knot for attaching many hooks, swivels, and small lures to monofilament or fluorocarbon line.
- Pass about six inches of line through the hook eye.
- Wrap the tag end around the standing line five or six times.
- Pass the tag end through the small loop beside the hook eye.
- Pass it back through the larger loop created by the previous step.
- Moisten the knot.
- Pull it down slowly and firmly against the hook eye.
- Trim the tag end while leaving a small amount of line beyond the knot.
View the complete improved clinch knot instructions before tying it for the first time.
After tightening any knot, pull firmly on both the standing line and terminal tackle. Retie it if the wraps overlap badly, the knot slips, or the line looks curled, flattened, or damaged.
8 Add a Sinker and Bobber for a Basic Bait Rig
For a simple freshwater bait setup:
- Tie the hook to the end of the line.
- Attach one or two small split-shot sinkers 6 to 12 inches above the hook.
- Clip a bobber to the line above the sinker. Start with the hook about one to three feet below the bobber.
- Add a worm, cricket, prepared bait, or other legal bait to the hook.
The U.S. Fish and Wildlife Service also recommends positioning one or two sinkers 6 to 12 inches above the hook in its first-time fishing guide.
Use only enough weight to cast and control the bait. Too much weight can reduce sensitivity and cause the bait to sink unnaturally.
9 Set the Reel Drag
The drag allows line to leave the reel when a fish pulls harder than the line or rod should safely resist. A drag that is locked down can break light line, straighten a hook, or pull the hook from the fish.
- Close the bail.
- Hold the rod at a moderate upward angle.
- Pull line steadily from beyond the rod tip.
- Turn the drag knob clockwise for more resistance.
- Turn it counterclockwise for less resistance.
As a practical starting point, the line should come off under firm, smooth pressure before it feels close to breaking. For more precise adjustment, many anglers begin near one-quarter of the line’s rated breaking strength and fine-tune it for the rod, knot, leader, fish, and fishing conditions.
10 Perform a No-Hook Function Test
Before going near the water, replace the hook with a casting plug or unhooked practice weight.
- Confirm all rod sections remain fully seated.
- Confirm all guides remain aligned.
- Open the bail and check that line leaves the spool freely.
- Close the bail by hand and turn the reel handle.
- Check that line lays evenly across the spool.
- Pull against the drag and listen for a smooth drag click.
- Make several short practice casts in a clear area.
Three Easy Fishing Rigs for Beginners
Once the rod and reel are working correctly, the final setup depends on where the fish are feeding. These three rigs cover many common freshwater situations without requiring a large tackle collection.
| Rig | Parts needed | How to assemble it | Best use |
|---|---|---|---|
| Bobber rig | Bobber, split shot, hook, and bait | Bobber above one or two split shots; hook 6 to 12 inches below the weight | Panfish, trout, and other fish feeding above the bottom |
| Simple lure setup | Small spinner, spoon, crankbait, or soft-plastic lure | Tie the lure directly to the line or suitable leader | Covering water and finding active fish |
| Basic bottom rig | Sinker, swivel, leader, hook, and bait | Place the sinker above the swivel, then connect a leader and hook | Catfish, carp, and fish feeding close to the bottom |
Which Rig Should You Use First?
Start with a bobber rig when fishing a small pond, lake, dock, or slow river. It is easy to cast, the bobber makes bites visible, and the hook depth can be changed without cutting the line.
Choose a lure when you want to walk the shoreline and search for active fish. Choose a bottom rig when you know fish are feeding near the bottom and the current or depth makes a bobber difficult to control.
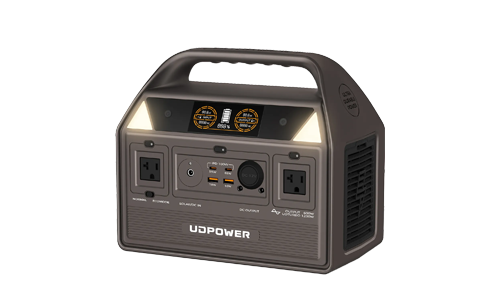
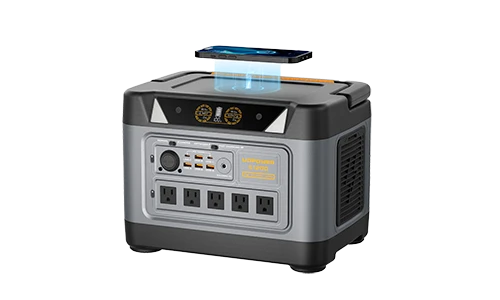
Portable Power for Longer Fishing Trips
Setting up a rod does not require electricity, but modern fishing trips often include phones, cameras, rechargeable lights, fish-finder batteries, bait aerators, action cameras, laptops, and portable coolers.
A compact power station can keep this supporting equipment charged without running a gas engine near the shoreline. The right model depends on whether you are planning a short bank-fishing session or an overnight campsite.
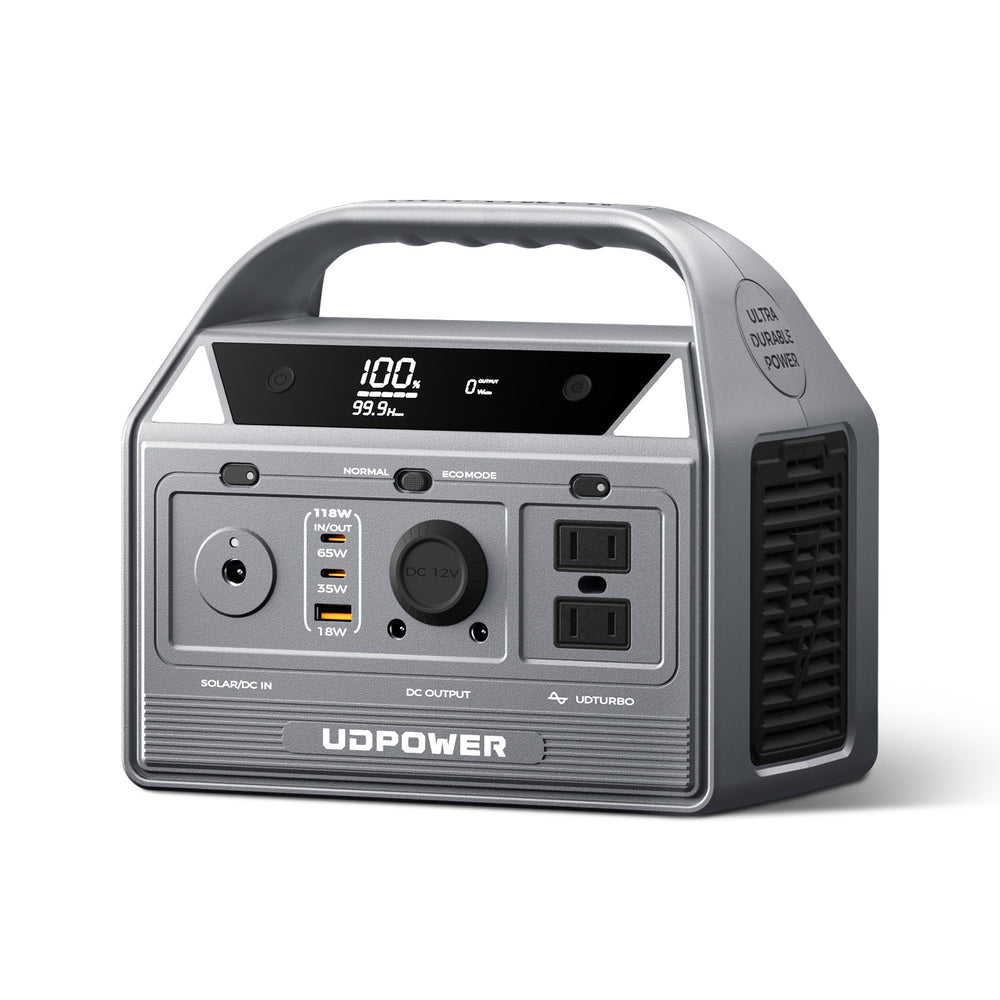
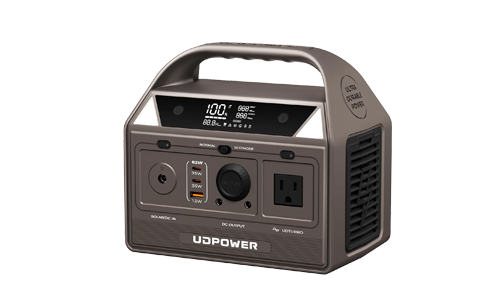
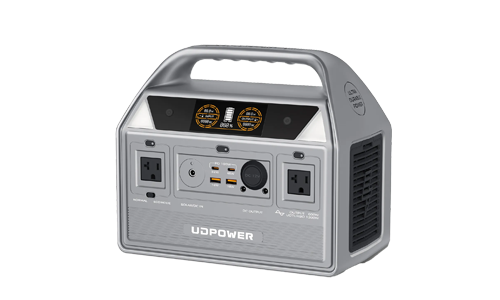
UDPOWER C400: Best for Day Fishing and Light Gear
The C400 is the more practical choice when carrying weight matters. It can recharge phones, camera batteries, lights, small electronics, and other low-power fishing accessories without taking up much room in a vehicle or campsite.
- Battery capacity: 256Wh
- Rated AC output: 400W
- Peak output: Up to 800W with UD-TURBO
- Battery chemistry: LiFePO4
- Battery cycle rating: 4,000+ cycles
- Weight: Approximately 6.88 pounds
- Dimensions: Approximately 8.27 × 5.12 × 7.09 inches
- Charging options: Wall, car, USB-C, and compatible solar input
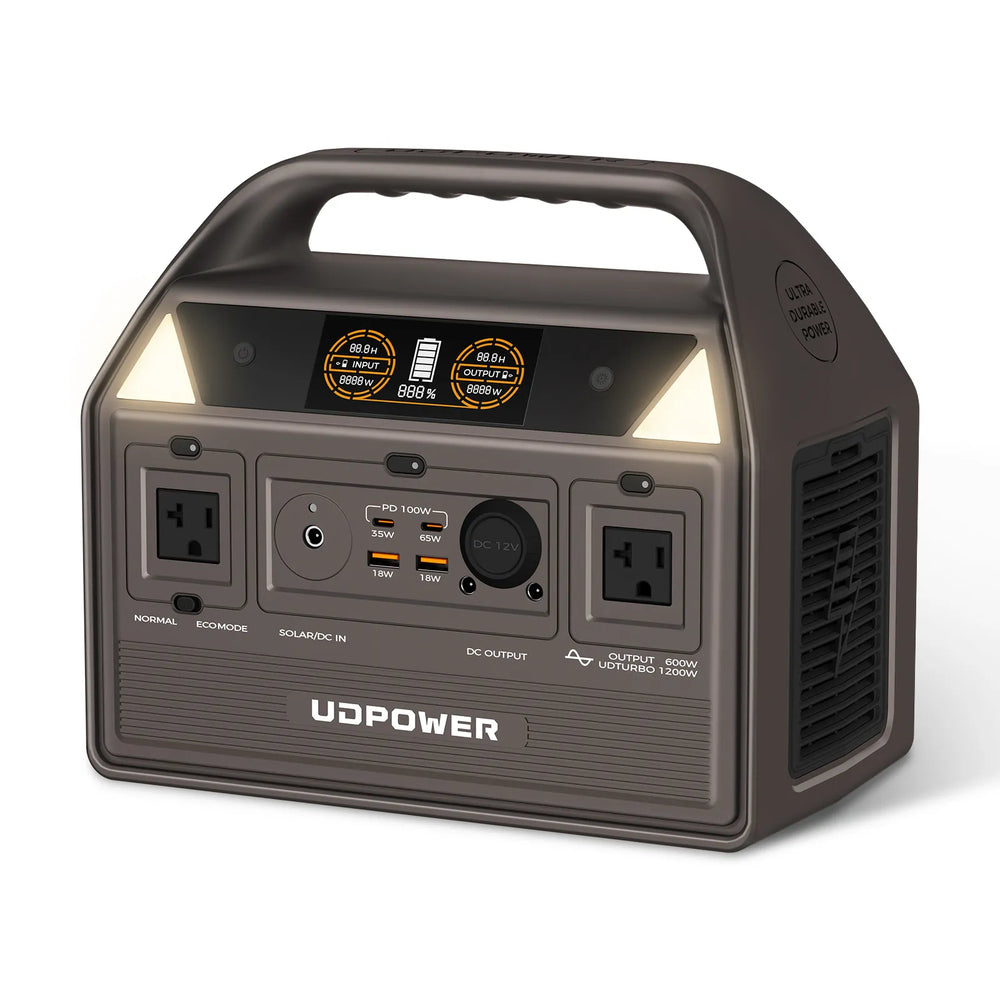
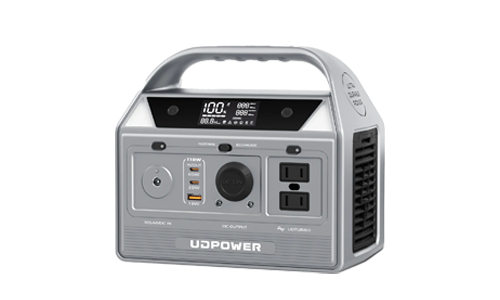
UDPOWER C600: Best for Overnight Fishing Camps
The C600 provides more than twice the battery capacity of the C400 while remaining portable enough for vehicle-supported fishing, weekend trips, and shoreline camps. Its higher capacity is better suited to repeated camera charging, lighting, a portable refrigerator, and several devices used over a longer trip.
- Battery capacity: 596Wh
- Rated AC output: 600W
- Peak output: Up to 1,200W
- Battery chemistry: LiFePO4
- Battery cycle rating: 4,000+ cycles
- Weight: Approximately 12.3 pounds
- Dimensions: Approximately 11.1 × 6.1 × 9.4 inches
- Outputs: AC, USB-A, USB-C, DC, and 12V car-style output
| Model | Capacity | Rated output | Weight | Best fishing-trip fit | Official specifications |
|---|---|---|---|---|---|
| UDPOWER C400 | 256Wh | 400W | About 6.88 lb | Day trips, camera equipment, phones, lights, and light accessories | View C400 specifications |
| UDPOWER C600 | 596Wh | 600W | About 12.3 lb | Overnight trips, repeated charging, lighting, and portable cooling | View C600 specifications |
For more trip-planning advice, read the portable power setup guide for fishing and road trips .
Common Fishing Rod Setup Mistakes and How to Fix Them
| Problem | Likely cause | How to fix it |
|---|---|---|
| The reel will not retrieve line | The line was tied on with the bail closed or is outside the line roller | Open the bail, reposition the line beneath the bail wire, and respool if necessary |
| Loose coils jump off the spool | The reel is overfilled, the line was wound loosely, or it has excessive memory | Remove enough line to leave about 1/8 inch below the spool lip and respool under tension |
| The line twists into loops | The filler spool was facing the wrong direction or the lure is spinning | Flip the filler spool while loading line or add an appropriate swivel to a spinning rig |
| The rod feels crooked | The guides or ferrules are misaligned | Separate or loosen the sections, realign the guides, and reseat them |
| The reel shifts while casting | The reel seat is loose or the reel foot is not fully seated | Reposition the reel foot and tighten the locking ring by hand |
| Casts are unexpectedly short | Line is too heavy, the spool is underfilled, the lure is too light, or a guide was missed | Check the rod rating, spool level, lure weight, and complete line path |
| Line breaks when pulling | Damaged line, a poorly tied knot, an overly tight drag, or a cracked guide | Cut off damaged line, retie the knot, loosen the drag, and inspect every guide |
| The line slips around the spool | Braided line was tied directly to a smooth bare spool | Add monofilament backing or approved spool tape before respooling |
| The rod separates during casting | Ferrules were not fully seated or became loose | Clean, reseat, and regularly check each joint during the trip |
The Most Important Correction: Check the Line Roller
One of the easiest mistakes to miss is routing the line outside the spinning reel’s line roller. The reel may appear to work, but the line will rub against the bail wire, retrieve unevenly, and eventually become damaged.
With the bail closed, look closely at the point where the line enters the reel. It should sit inside the small roller at the end of the bail arm.
How Setup Changes for Different Reel Types
| Reel type | Position on rod | How line is released | Setup difficulty | Best suited to |
|---|---|---|---|---|
| Spinning reel | Below the rod | Open the bail | Easy | Beginners, light lures, and general-purpose fishing |
| Spincast reel | Above the rod | Press and release a thumb button | Very easy | Children, casual fishing, and short casts |
| Baitcasting reel | Above the rod | Press the spool-release button | Moderate to advanced | Accurate casting, heavier lures, and stronger line |
| Fly reel | Below the rod | Line is managed and cast by hand | Specialized | Fly line, artificial flies, and dedicated fly-fishing techniques |
Spincast Setup
A spincast reel has a closed face and a line-release button. Mount it above a casting-style rod, thread line through the reel’s front opening, and run it through the rod guides. Make sure the line exits through the center opening without rubbing the cover.
Baitcasting Setup
A baitcasting reel sits above the rod. Pass the line through the reel’s levelwind guide before tying it to the spool. After spooling, adjust both spool tension and braking controls to match the lure. Too little control can allow the spool to rotate faster than line leaves the reel, creating a backlash.
Fly-Rod Setup
A fly outfit uses backing, fly line, leader, and tippet rather than a conventional single fishing line. Match the fly rod, reel, and fly-line weight before attaching the backing and line.
The 60-Second Pre-Cast Checklist
Run through this short check every time you assemble the rod. It catches small errors before they turn into broken equipment or an unsafe cast.
- Rod sections are secure and all guides are aligned.
- The reel seat is tight and the handle is installed correctly.
- The line passes beneath the bail and through every guide.
- The spool is not overfilled.
- The knot is fully seated and has passed a firm pull test.
- The drag releases line smoothly.
- The hook point is sharp and not buried in the rod grip.
- The lure or sinker is within the rod’s printed weight range.
- No person, pet, tree branch, vehicle, or power line is in the casting path.
- You have the required license and understand local size, season, bait, and catch limits.
Fishing-license requirements vary by state. Use the state fishing-license directory and confirm current rules with the appropriate state agency before fishing.
How to Clean and Store a Fishing Rod and Reel
After Freshwater Fishing
- Remove mud, vegetation, bait residue, and visible dirt.
- Wipe the rod blank, guides, reel, and handle with a damp cloth.
- Dry the equipment before placing it in a case.
- Loosen the drag for long-term storage.
- Secure the hook to the hook keeper, not a guide insert.
After Saltwater Fishing
- Leave the drag tightened temporarily so water does not enter the drag stack.
- Use a gentle mist of fresh water rather than a high-pressure spray.
- Wipe away salt and moisture with a soft cloth.
- Allow the reel to dry completely.
- Return the drag to a loose storage setting after drying.
When to Replace Fishing Line
Replace or cut back the line when you notice:
- Fraying or fuzzy sections
- Flat spots or severe coils
- Discoloration from heavy use
- Repeated unexplained knot failures
- Abrasion after fishing around rocks, docks, shells, or wood
- Reduced casting performance that does not improve after removing twisted line
Fishing Safety and Responsible Use
A correctly assembled fishing rod can still cause injury when used carelessly. Before every cast, look behind and above you. Keep hooks covered during transport, wear a suitable personal flotation device when boating or wading, and do not leave cut fishing line on the bank.
The U.S. Fish and Wildlife Service beginner guide recommends fishing with a companion, handling hooks carefully, checking the area before casting, and wearing a Coast Guard-approved life jacket while boating or wading.
When releasing a fish, wet your hands before handling it, minimize the time it spends out of the water, and avoid placing it on dry dirt, concrete, or hot surfaces. When a hook is swallowed deeply, cutting the line may cause less damage than forcibly pulling the hook out.
Frequently Asked Questions
What is the easiest fishing rod and reel setup for a beginner?
A 6- to 7-foot light, medium-light, or medium spinning combo is the easiest general-purpose option for most beginners. Match it with 6- to 10-pound monofilament line and a simple bobber, split shot, and hook rig. Follow the ratings printed on the rod and reel.
Does the reel go above or below the fishing rod?
A spinning reel hangs below the rod, while a baitcasting or spincast reel sits above the rod. The guides should face the same direction as the reel.
Should I open the bail before tying line to a spinning reel?
Yes. Open the bail before attaching the line to the spool. Otherwise, the line may not pass beneath the bail and through the line roller, preventing the reel from retrieving it correctly.
How full should a spinning reel spool be?
A practical starting point is to fill the spool until the line sits about 1/8 inch below the outer lip. Too little line reduces casting distance, while overfilling can cause loose coils and tangles.
Why does my fishing line keep twisting?
Common causes include loading line from the filler spool in the wrong direction, spooling without enough tension, reeling against a slipping drag, or using a lure that spins continuously. Remove the twisted section, respool correctly, and add an appropriate swivel when the rig requires it.
What knot should a beginner use to attach a hook?
The improved clinch knot is a useful beginner knot for attaching many hooks, swivels, and small lures to monofilament or fluorocarbon line. Always moisten, tighten, trim, and pull-test the knot before casting.
How far above the hook should a sinker be placed?
On a basic bobber rig, one or two small split-shot sinkers can be placed approximately 6 to 12 inches above the hook. Adjust the distance and weight to match the bait, depth, current, and target fish.
How do I know whether my reel drag is set correctly?
Pull the line steadily through the rod guides. It should leave the spool smoothly under firm pressure before the line feels close to breaking. If the line will not move, loosen the drag. If it comes off with almost no resistance, tighten it gradually.
Can I put braided line directly on a spinning reel?
Some braid-ready spools can hold braid directly. On a smooth conventional spool, use monofilament backing or manufacturer-approved spool tape to stop the entire braid load from slipping around the spool.
Why does my rod have a gap between the sections?
Some multi-piece rods are designed to retain a small gap at the ferrule. The important points are that the connection is firm, the sections do not rotate, and the guides remain aligned. Do not force the joint past its intended stopping point.
Can I use a swivel with every fishing lure?
No. A swivel is useful when a rig or lure causes line twist, but it can change the action of some lures. Small spinners and rotating bait rigs often benefit from a swivel, while many crankbaits, jigs, and soft plastics are commonly tied directly to the line or leader.
Do I need a fishing license before practicing with my rod?
You generally do not need a fishing license to practice casting on private land where fishing is not taking place. A license may be required when fishing public or private waters, depending on state law, age, residency, location, and exemptions. Check the current rules for the exact water you plan to fish.
Helpful Setup and Safety Sources
Build a Better Fishing-Trip Power Setup
Keep phones, cameras, rechargeable lights, portable coolers, and other outdoor essentials ready throughout your trip with quiet, rechargeable LiFePO4 power.